Setup Geofence Location For Location Based Check-in Check-out
Setup geofence location. What is a geofence?
A geofence is a specified boundary containing a location of interest, it may be a circle or polygon.
First you need location based check-in check-out to know when people enter and leave a location. Next you want this done by people simply having their phones with them to act as check-in check-out badge. so they don’t need to tap-in or tap-out. Additionally you have a Cloud-In-Hand® Stratus-io Time & Attendance solution with the Remote Check-in app. Finally you’ll see the setups to setup a Geofence location on your cloud-in-hand.com admin account.
Enter Address And Set The Geofence - Circle
Login to your Cloud-In-Hand® Stratus-io Time & Attendance account with Remote Check-in option enabled.
Next select men EVENTS > GEOFENCES

Click “Add New” to see the “Add new Geofence” view, here you will setup the geofence.
First enter the full address for the geofence location, in the “Address: ” field and select “Find” and map shows the location.
Second select the “Type:” of shape for the geofence, the default circle is easiest and most efficient. Third set “Radius” to approximate size, then place the ‘open hand’ icon on the circle center and select. Note when cursor nears a geo location marker, icon changes to ‘pointing hand’, circle can’t be placed with this cursor.

Next see the circle on the target location and adjust the size as needed.

Setup Geofence Polygon
First steps are the same as setup geofence location using a circle. Second select the “Type:” of shape for the geofence as Polygon then place the ‘open hand’ icon at the first point of the polygon on and select. Third for efficiency you want to minimize the number of points of the polygon, keep to 4 points if possible. Place 3 polygon points as shown below (1, 2, 3) then use the point shown to adjust the geofence location size around the location. Depending on the geofence location shape and position of the geo location marker, you may not be able to adjust the point (4). When the polygon point and geo location marker are too close you can’t grab the point. Needing this step is typically uncommon.

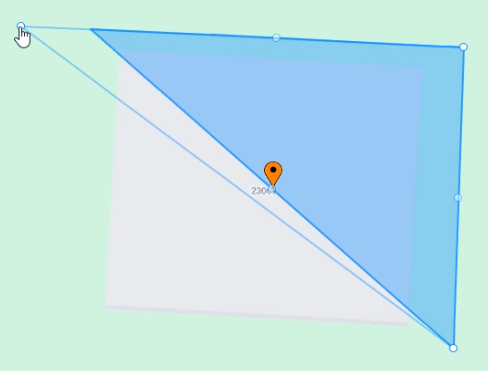
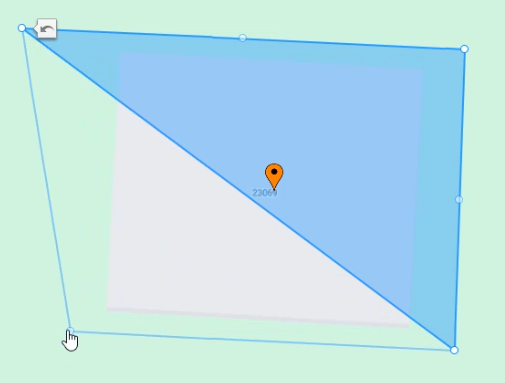
In this case move one of the polygon points temporarily as shown below and adjust the polygon as shown below.

Now the polygon point is away for the geo location marker and you grab it to adjust.

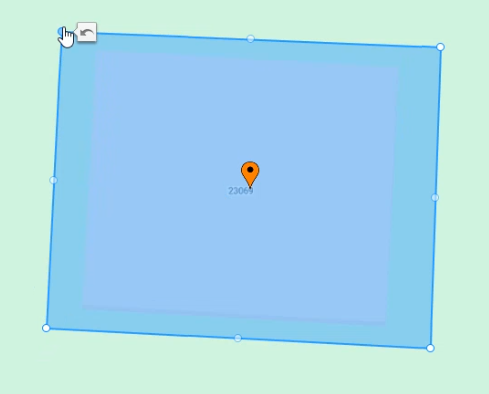
Finally restore the polygon point moved back to complete the geofence.

Geofence Polygon Setup Notes
Additional notes for setup geofence location with a polygon.
First it’s common to want to drag a side of the polygon to move the side as shown below.

However this adds two polygon points, not the intended result. Use the “Undo last edit” icon to undo such actions.

Finally always know you start a polygon over using the “Clear” button if needed.
Give Geofence A Name And Save
First enter the geofence name in “Name:” field, and select “Save”.
Next create the Event(s) that will use the geofence an assign the geofence to the Event.
Also know you have the option to edit your geofence polygon after it is saved.
Finally the geofence is used by the Cloud-In-Hand® Stratus-io Remote Check-in app to automatically check-in and checkout persons as they enter and leave the geofence.
Contact serialio.com for all you mobile attendance and emergency headcount needs.
